A thoughtful stationery gift does not require an open-ended shopping trip. A clear stationery gift budget helps you choose something useful, attractive, and appropriate without quietly adding “just one more” item to the basket. Start with the recipient, set a total ceiling, and then divide that amount between a main item, a small personal detail, and any presentation costs. This approach works for a birthday, a thank-you, a classmate, a colleague, or a holiday exchange.
The aim is not to spend the maximum. It is to make each part of the gift earn its place.
Start with a real spending limit
Before browsing, write down the maximum amount you are comfortable spending for the complete gift. Treat that number as a ceiling, not as a target you must reach. If your limit is $15, for example, the gift should remain at or below $15 after you account for wrapping, a card, and any other costs relevant to your situation.
A useful way to avoid guesswork is to split the ceiling into three envelopes:
- Gift contents: about 75–85% of the total.
- Presentation: about 5–15% for a card, tissue, a bag, or simple wrapping.
- Buffer: about 5–10% for a price change, an extra note, or an item you discover is genuinely useful.
These are planning ranges, not rules. If you already have wrapping materials, move that portion into the contents envelope. If the gift will be handed over in a reusable pouch you already own, your practical budget may go further. Conversely, if you need to mail it, reserve postage separately rather than pretending it is part of the product budget.
Next, decide whether your limit applies to one person or to several gifts. A $40 total for four coworkers is not the same decision as a $40 gift for one close friend. Divide the group total first, then allow a small adjustment for different interests. You can keep the overall total even while giving one person a slightly more functional combination and another a more decorative one.
Write down three answers before you shop: who is receiving the gift, what is the total ceiling, and when will you stop looking? A fixed stopping point prevents comparison browsing from turning a simple purchase into an unplanned bundle.
Match the budget to the recipient and use case
The best budget allocation depends less on age or occasion than on how the recipient will use the item. Ask what they already carry, write on, decorate, or collect. If you cannot ask directly, choose a flexible format and avoid highly specific assumptions.
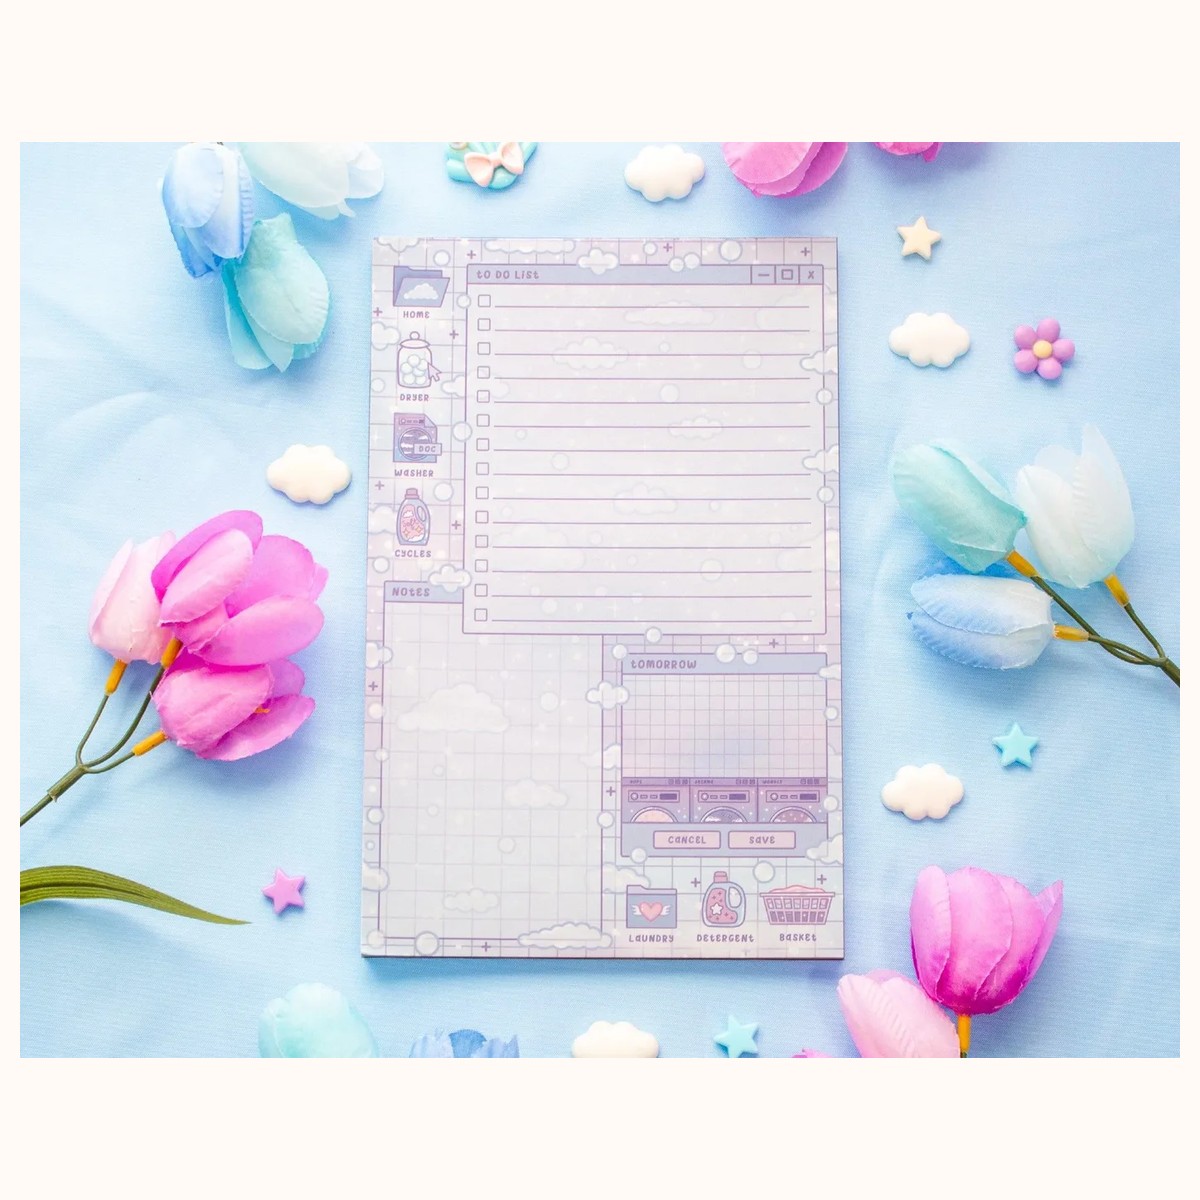
For a practical note-taker, place most of the budget in a useful writing surface. A $12 ceiling could cover one substantial planner pad, with the remaining amount reserved for a short handwritten message if you already have an envelope. The Laundromat Daily Planner Pad is an example of a focused choice: its name signals a daily planning use, and the catalog description identifies it as a 50-sheet, non-adhesive pad. That distinction matters. Do not present it as sticky notes or promise that it will attach to a surface.
For someone who enjoys decorating planners or notebooks, a small combination may be more satisfying than one larger item. The Blooming Records Sticker Sheet is listed at $5 and contains 18 designs on a 4-by-6-inch sheet. Pairing it with Blooming Records Sticky Notes, also listed at $5, creates a $10 themed set before presentation costs. The two items share a visual theme while serving different jobs: decoration and quick reminders.
For a person whose taste you do not know, prioritize neutral utility over a narrow theme. A memo pad, note cards, or a simple sticker sheet can work across several routines, but check the product description carefully. A non-adhesive pad is not interchangeable with a sticky pad; a decorative sheet is not automatically a complete writing kit. Let the intended use, not the word “cute,” determine the combination.
Use the occasion to set the level of personalization. A small thank-you may need only one useful item and a sincere note. A milestone gift can justify a two- or three-piece set if the recipient’s habits support it. For a classroom or office exchange, standardize the price range and choose an item that does not require knowing someone’s exact style. If you need help confirming a product detail before committing, use the store’s contact page; for broader store information, consult the about page.
Build a bundle in spending tiers
Once you know the recipient and ceiling, choose one of three simple structures: single item, paired set, or themed bundle. Naming the structure first keeps the budget from being driven by whatever catches your eye last.
Tier one: one-item gift. Use this when the total is modest, the occasion is casual, or the recipient values a specific format. A $5 sticker sheet can be complete when paired with a personal note you already have materials for. The Haunted House Sticker Sheet is a real catalog example at that price. Give it to someone who enjoys paper crafts or seasonal decoration; do not choose it for a recipient who rarely uses stickers simply because it fits the limit.
Tier two: coordinated pair. This is often the easiest balance for a $10–$15 ceiling. Combine two items with distinct functions, then stop. The $10 Blooming Records example works because the sticker sheet and sticky notes are not duplicates. Another option is a $12 planner pad as the central item plus a small message card sourced from what you already have. If adding a second product would push the total over the ceiling, keep the single useful item and improve the note rather than forcing a weaker add-on.
Tier three: themed bundle. Reserve this for a larger ceiling or a shared group gift. Select one anchor item, one complementary item, and one finishing detail. For example, a $12 planner pad can anchor a planning-themed bundle, while a $5 accessory supplies visual personality. At $17 before wrapping, it belongs only in a budget that comfortably allows it. A themed bundle is successful when every component has a role; three loosely related items are not automatically more thoughtful than one well-chosen item.
Calculate the subtotal before you think about presentation. If the subtotal is already at the ceiling, do not rationalize an extra item as “small.” Remove an item, choose a lower-cost structure, or use materials you already own. When prices are listed in the catalog, use those displayed prices as planning figures and recheck the product page before purchase because availability or pricing can change.
Check the basket before you buy
A final five-minute audit catches most budget mistakes. Read each item name and description, then answer four questions: Is this the right format? Is the quantity clear? Does it duplicate something else? Will the recipient realistically use it?
Format errors are especially common with stationery accessories. Confirm whether a pad is adhesive or non-adhesive, whether a sheet is sold alone, and whether a product is decorative rather than a complete writing tool. For instance, the Blooming Records Sticky Notes listing describes one 3-by-3-inch pad with 50 sheets. That is a specific quantity, not a promise of multiple pads. Accurate expectations make a modest gift feel more reliable.
Then check the arithmetic in this order:
1. Add the product prices. 2. Add any required wrapping, card, or delivery cost that applies to your situation. 3. Subtract the result from your ceiling. 4. Decide in advance what happens to the remainder.
If the remainder is under $2, stop shopping and use a handwritten message. If it is $3–$5, consider one small catalog accessory only if it complements the main item and does not create a duplicate. If the remainder is substantial, do not spend it automatically; save it, upgrade the presentation, or keep the gift intentionally simple.
Troubleshoot three common scenarios. If the preferred product is unavailable, preserve the recipient’s use case rather than its exact look: replace a themed decorative item with another decorative item, not with an unrelated object. If the bundle exceeds the ceiling, remove the least functional piece first. If you are buying for several people, create one approved shortlist and apply the same price cap to everyone, with small theme changes only where necessary.
Finally, save the product links and your calculation until the gift is delivered. The Accessories collection is a useful starting point for comparing the relevant catalog range, while the individual product pages provide the details needed to verify format and quantity. A budget is doing its job when you finish with a gift that feels deliberate—not when every last dollar has disappeared.
Related reading: How to Build a Personalized Gift Bundle · 10 Best Creative Keychains for Thoughtful Gifts · How to Choose Stickers for Journals and Planners