Learning how to apply laptop decals without bubbles is mostly a matter of preparation, patience, and controlled pressure. A decal can look uneven when dust is trapped underneath, when the backing is removed too quickly, or when a large area is pressed down before it is aligned. The good news is that most small laptop stickers can be applied neatly with household items and a slow, deliberate method.
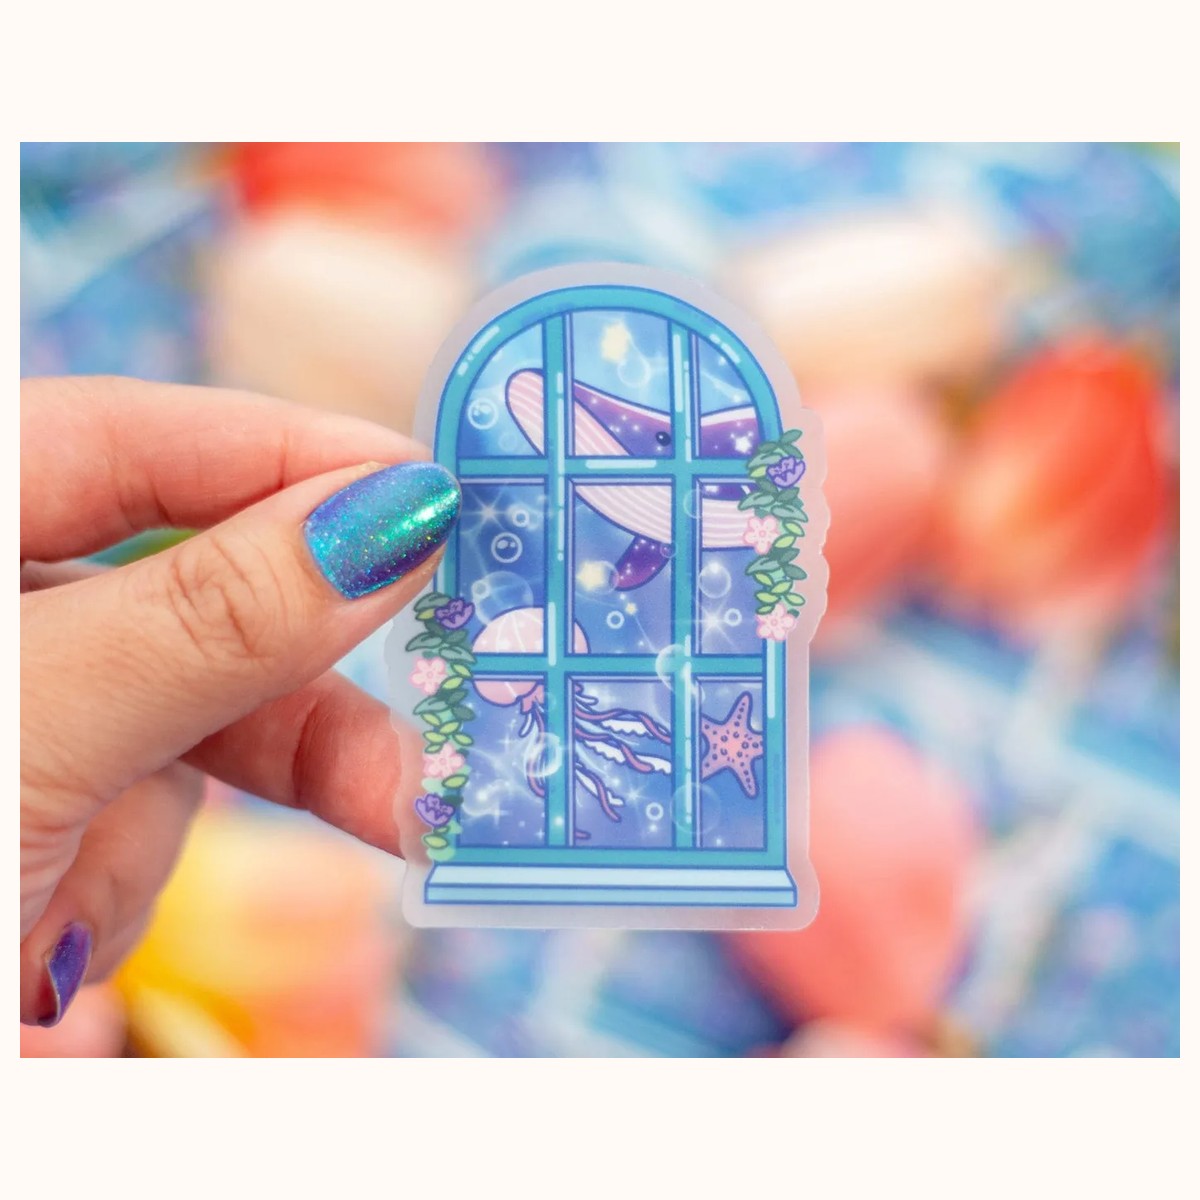
This guide covers smooth application, placement decisions, troubleshooting, and careful removal. It works especially well for small vinyl designs such as the Ocean Window CLEAR Cute Aesthetic Vinyl Sticker or the Fortune Teller Sticker | Vinyl Laptop Cute Sticker Decal. Always check the individual product description before applying, because finishes, adhesives, and intended surfaces can vary.
Prepare the laptop and choose the placement
Start by shutting down the laptop, unplugging it, and closing the lid. Applying a decal to a cool, stable surface is easier than working while the device is warm or moving. Place the laptop on a flat table with enough room to turn it or view the design from several angles.
Decide where the decal should go before removing any backing. The lid is usually the simplest location because it is broad and flat. Avoid hinges, ventilation openings, rubber feet, ports, seams, sharp corners, and areas that rub against a sleeve. A decal placed across a lid edge may lift when the laptop opens and closes. A design near a logo can look intentional, but leave enough space that the two elements do not crowd each other.
Use a temporary guide if alignment matters. Put two small pieces of low-tack tape along one edge of the decal, creating a hinge while the backing remains in place. You can also cut a piece of plain paper to the decal’s approximate size and move it around first. This is useful for a compact design such as the Ocean Window sticker, listed at approximately 2 by 3 inches. Test whether the clear background looks good against the laptop color before committing to a position.
Next, clean the area. Wipe away crumbs and loose dust with a soft, dry microfiber cloth. If the surface has fingerprints or oily residue, use a small amount of a suitable screen-safe or electronics-safe cleaner on the cloth, not directly on the laptop. Follow the laptop maker’s care instructions if available. Do not soak the surface, spray into openings, or apply a liquid while the device is powered on. Let the area dry completely before continuing.
Run a fingertip lightly over the intended spot. If you feel grit, clean it again. A tiny particle can create a visible bump that looks like an air bubble after the decal is pressed down. Check the decal itself as well, and keep its adhesive side away from dust while you prepare.
Apply the decal slowly from one edge
For a small decal, peel back only a narrow strip of the backing—about a quarter of the decal rather than the whole sheet. Hold the exposed adhesive above the laptop and line up the taped hinge or chosen edge. Do not stretch the decal. Let it rest lightly on the surface once the first section is correctly positioned.
Use a plastic card with a smooth edge, such as an old store card, to press the decal outward from the attached edge. Wrap the card in a clean, thin cloth if you are concerned about marking the surface. Move in short strokes from the center of the attached section toward the nearest outer edge. The aim is to push air ahead of the adhesive rather than trapping it underneath.
Peel the backing away in small stages while continuing to sweep the card across the newly exposed section. Keep the backing low and close to the surface instead of pulling it straight upward. This gives you more control and makes it easier to pause if the design begins to drift. For a sticker with an irregular outline, press broad, solid areas first and leave narrow points or thin extensions until the surrounding area is secure.
If the decal is very small, you may be able to use a fingertip instead of a card. Place the pad of your finger near the applied edge and smooth toward the outside with firm, even pressure. Avoid rubbing repeatedly over one spot, which can shift the decal or create a crease. Work under bright, angled light so a ridge or trapped speck is easier to see.
After the decal is down, make one final pass around its perimeter. Pay special attention to pointed corners and curves. Press those areas with a clean fingertip, not a fingernail. If the edge has lifted because it crossed a curve or seam, stop and decide whether to reposition it or trim the placement; forcing it down can leave a permanent fold.
For a product example, the Fortune Teller decal is described in the catalog as a matte vinyl design measuring approximately 3.5 by 2.6 inches. Its compact footprint is manageable with the edge-first method, but its wider shape still benefits from peeling the backing gradually rather than trying to drop the whole sticker onto the lid at once.
Fix bubbles, wrinkles, and alignment mistakes
A small bubble does not always mean the decal must be removed. First, identify what is underneath it. If the bubble is a smooth pocket of air, push it toward the closest edge with a card or fingertip. Start just behind the bubble and make one slow stroke outward. Several light strokes in different directions can spread the air rather than release it, so use a clear route to an edge.
If the bump is caused by dust or grit, pressure will not solve the problem. Lift the nearest edge carefully until you can reach the particle with clean tweezers. Remove the debris, lower the decal again, and smooth the area from the fixed side outward. Do not scrape at the adhesive with a sharp object, since that can damage the decal or mark the laptop’s finish.
A crease requires a different decision. If only a small section has been applied and the adhesive has not fully settled, lift it slowly from the nearest edge and lay it back down without pulling hard. Do not yank upward, because stretching can change the shape. If the crease remains after gentle repositioning, it may be better to remove the decal and use a fresh one rather than repeatedly lifting the same area.
When the decal is crooked, stop before pressing the rest of it. Lift it from a corner or edge, keeping the decal low and supporting it with your fingers. Re-align the guide edge, then continue in smaller sections. The more of the decal that has been firmly smoothed, the less practical repositioning becomes. For that reason, a temporary tape hinge is valuable for designs that need to sit parallel to a laptop edge.
Do not use a hair dryer, heat gun, oil, or aggressive solvent as a default bubble fix. Heat and chemicals may affect a decal, its adhesive, or the laptop finish, and the product description may not cover those combinations. Use only care methods that are appropriate for both surfaces. If you are unsure about compatibility, pause and verify through Farouk Book Store’s contact page or the product information before proceeding.
Care for the finished decal and remove it safely
Once applied, give the decal a little time without rubbing, stacking, or sliding the laptop into a tight sleeve. Keep the lid dry and clean it with a soft cloth using light pressure. Avoid picking at the edge when opening the computer or wiping around it. If the decal begins to lift, do not press dirt back under the edge. Clean only the surrounding surface as appropriate and decide whether the decal should be removed.
Removal is easiest when you work slowly. Start at a corner and lift the edge with a fingernail or a smooth plastic card. Pull the decal back over itself at a low angle instead of pulling straight up. A low, steady pull gives you more control and can reduce the chance of leaving a torn fragment. If the decal resists, stop rather than forcing it. Product instructions should take priority, especially for a decal with an unusual finish or adhesive.
After removal, inspect the surface in good light. If there is residue, begin with a dry microfiber cloth and gentle rubbing. Do not assume that alcohol, oil, acetone, or household cleaners are safe for every laptop coating. Check the laptop manufacturer’s surface-care guidance or ask Farouk Book Store about the specific product before trying anything stronger. Never allow liquid to run toward the keyboard, hinge, ports, or vents.
For future placement, save the original backing only if it remains clean and the product instructions indicate that repositioning is suitable. Otherwise, treat a removed decal as a one-time application. Browse the Laptop Decals collection for other designs, and compare the listed size and surface description before choosing a replacement. A smaller design is often the better choice when you are applying a decal for the first time or working around a laptop logo.
The simplest formula is: clean the surface, test the position, expose a small adhesive section, smooth from the fixed edge outward, and correct problems early. With that approach, you can personalize a laptop while keeping the finish neat and making removal a considered, low-risk process.
Related reading: How to Choose Stickers for Journals and Planners · Vinyl vs. Paper Stickers: A Complete Guide · Best Stickers for Scrapbooking: A Creative Guide