Good water bottle sticker care starts before the sticker touches the bottle. A clean, smooth placement area gives the adhesive its best chance to settle, while a gentle cleaning routine helps protect the design and its edges. The goal is not to treat every sticker as indestructible. Instead, match the sticker to the bottle’s surface, avoid unnecessary heat and friction, and check how moisture is reaching it.
This guide focuses on practical everyday decisions: where to place a sticker, how to apply it without bubbles, how to wash around it, and what to do when a corner lifts. The same habits work for a reusable bottle, travel tumbler, or smooth flask, but always follow any care instructions supplied with your specific bottle and sticker.
Choose the right placement before applying
Look for a smooth, low-contact area
Choose a broad, smooth section of the bottle rather than a seam, sharp curve, textured grip, or recessed logo. A sticker needs an even surface so the center and edges can make consistent contact. On a strongly curved bottle, a large design may wrinkle or form narrow “fingers” of air near its sides. A smaller sticker can be easier to place neatly because it has less material that must bend at once.
Keep the sticker away from the drinking rim, mouthpiece, straw opening, handle hinges, and any area that rubs against a backpack pocket. These zones receive frequent contact, condensation, or repeated movement. The bottom of the bottle is also a poor choice if it regularly touches tables, sinks, or rough ground. A side panel that is visible but not handled constantly is usually a more forgiving location.
Think about the bottle’s daily routine. If it goes into a narrow cup holder, place the design where the holder will not scrape it. If the bottle is carried in a bag beside keys, choose a side that is less likely to be pressed against metal objects. If you want a cluster, leave small gaps between designs so you can wipe around each one and spot a lifted edge early.
Match the sticker to the use
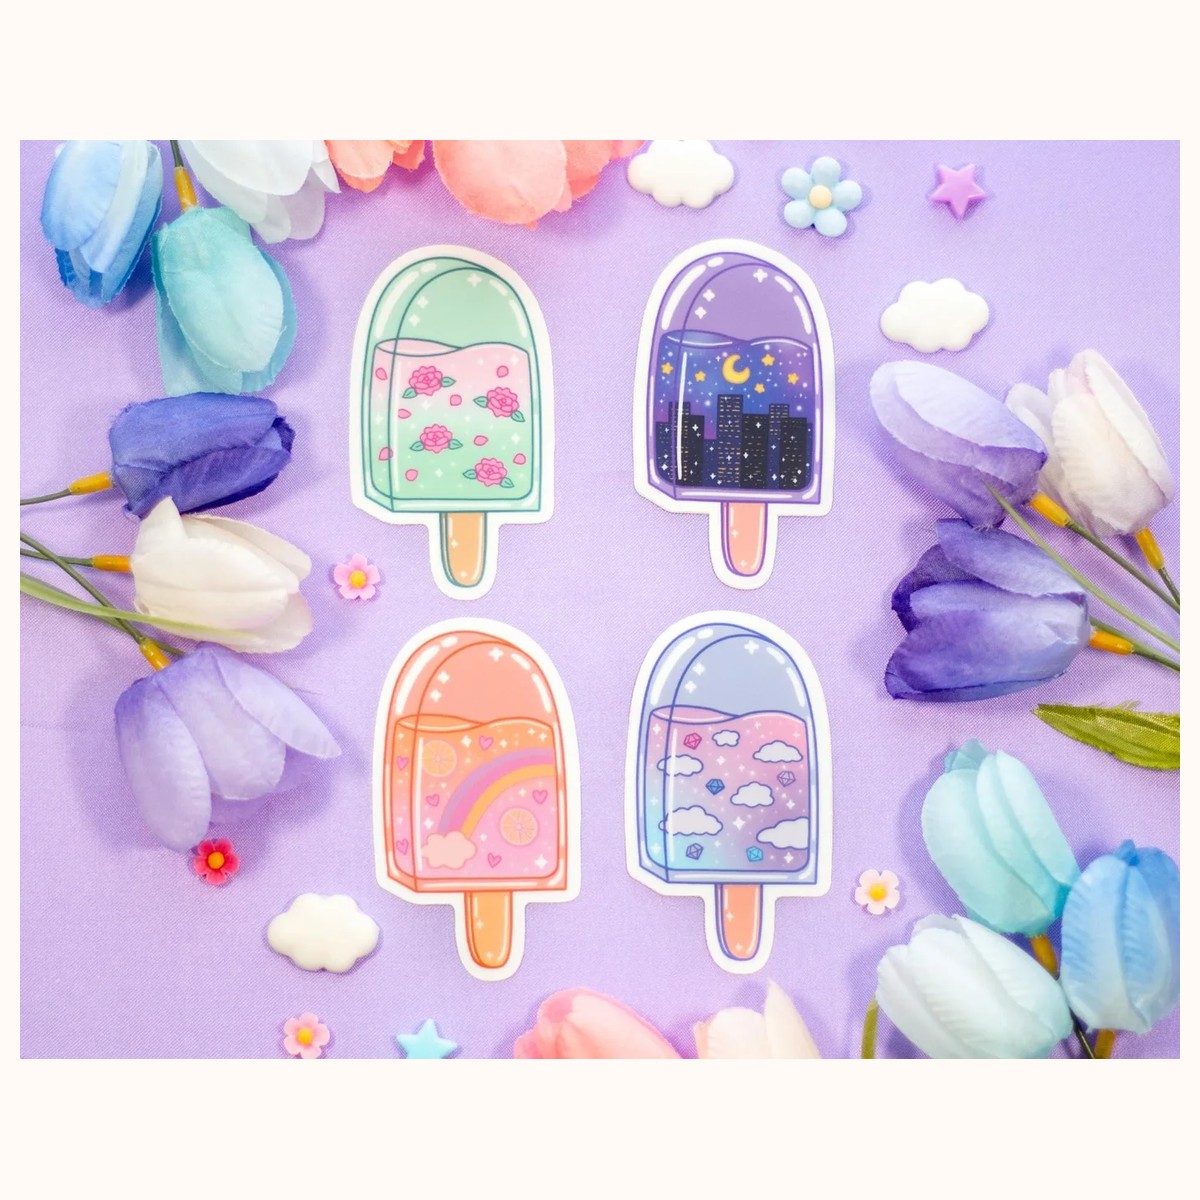
Read the product description rather than assuming every decorative sticker behaves the same way. For example, Farouk Book Store’s Popsicle Cute Aesthetic Vinyl Stickers are described as waterproof and weatherproof vinyl stickers, making them a sensible option for an everyday bottle that encounters splashes. The product page also notes that each sticker is approximately 1.8 by 3.25 inches, a manageable size for a curved surface.
The Dreaming Window Aesthetic Cute Vinyl Sticker is another compact choice. Its approximately 2.5 by 2.3-inch format can work well as a single accent or as part of a spaced arrangement. Its product description identifies it as waterproof and weatherproof, while also noting a matte finish and handmade nature. Those details help with selection, but they do not mean the sticker should be scrubbed, soaked for long periods, or placed over a bottle seam.
For more designs, browse the stickers collection. If you are uncertain whether a particular product suits your bottle, check its product details or use the store’s contact page before applying it.
Apply the sticker for a clean seal
Start with a cool, empty bottle. Wash the chosen area with mild soap and water, then rinse away any soap film. Dry it completely with a clean, lint-free cloth and let the surface air-dry for a few minutes. Do not apply a sticker over condensation, oil from your hands, dust, or leftover cleaner. These layers can prevent the adhesive from sitting flat.
Before removing the backing, hold the sticker against the bottle to test its position. Check it from the front, side, and the angle at which you normally carry the bottle. A temporary piece of low-tack tape can mark the top edge if you need help keeping a design level. Avoid repeatedly pressing the sticker against the bottle during this test; the aim is to plan the placement, not to begin bonding it prematurely.
Peel back only a small section of the backing, about a fingertip’s width. Align that exposed edge first, then slowly press the sticker down while smoothing from the attached area toward the unsealed area. Use a clean, soft cloth or the side of a plastic card with light pressure. Work across the design in short passes rather than forcing the whole sticker down at once.
If the bottle is curved, follow its shape gradually. Do not stretch the sticker to make it reach. Stretching can create tension that later pulls at the edges. For a wide sticker, start at the center and move toward one side, then return to the center and work toward the other side. For a small sticker, one slow center-to-edge pass may be enough.
A few tiny bubbles are not always a problem. Leave the sticker undisturbed for a little while, then inspect it on a dry bottle. If a small bubble remains, press it gently toward the nearest edge with a soft cloth. Avoid poking or cutting the sticker unless the product instructions specifically support that approach; a puncture can create a weak spot for water and dirt.
Once applied, give the sticker time to settle before washing the bottle. The exact waiting time depends on the sticker and bottle surface, so use the product instructions when available. In the meantime, keep the bottle dry and do not test the edge by picking at it.
Clean around the sticker without damaging it
The safest everyday routine is gentle and deliberate. Empty the bottle, separate removable parts if the bottle allows it, and wash the bottle with mild soap and water. Use a soft sponge or cloth on the stickered area. Wipe over the sticker rather than scrubbing back and forth across its edges. Repeated abrasive motion can catch a corner even when the sticker itself is advertised as waterproof.
Rinse away soap thoroughly, then pat the stickered area dry. Let the bottle air-dry with the cap open where appropriate. Pay particular attention to the lower edge and any spot where a curve can hold a thin line of water. Moisture sitting against an edge is more concerning than a quick splash because it gives the adhesive more time to soften or collect residue.
Avoid making the stickered area a target for stiff brushes, scouring pads, powdered cleaners, or rough towels. Also be cautious with very hot water, steam, and high-heat drying. A sticker may tolerate ordinary splashes yet still show wear from heat, friction, or repeated soaking. If the bottle is dishwasher-safe, check whether the bottle maker gives separate instructions for decorated surfaces. When that guidance is unclear, hand-washing around the sticker is the more conservative choice.
Do not use strong solvents to remove grime from the sticker. Alcohol-based products, oils, and other cleaners may affect the printed surface, finish, or adhesive, and the product page may not cover every cleaning chemical. Test any unfamiliar cleaner on an inconspicuous part of the bottle that is not near the sticker, but remember that this does not prove it is safe for the sticker itself.
Condensation is normal on a cold bottle, so you do not need to avoid chilled drinks. Instead, wipe away heavy moisture when convenient and do not store the bottle wet inside a closed bag. If a sticker becomes damp, dry it with a soft cloth using gentle presses. Do not lift the design to “dry underneath” unless an edge is already separating and you have decided to replace it.
Troubleshoot lifting, wrinkles, and wear
A lifting corner is easiest to address early. First, dry the bottle and the loose edge completely. Remove lint or grit from the surrounding surface with a clean, dry cloth. If the sticker is still clean and the adhesive remains usable, press the corner down from the attached side outward. Hold it in place with light, even pressure for a short time, then leave the bottle dry and undisturbed.
If the edge immediately springs back, the area may be too curved, too dirty, or too exposed to rubbing. Do not keep forcing it down indefinitely. Move the bottle away from heat and friction, and decide whether replacing the sticker will give a better result. A repaired sticker is not a reason to intensify cleaning or add household glue; extra adhesive can spread onto the bottle and make future removal harder.
Wrinkles usually point to a placement problem rather than a cleaning problem. If the sticker has only just been started and is not firmly bonded, stop and carefully reposition it instead of pulling at the printed face. If it is already attached, avoid repeated peeling. Repeated removal can stretch the sticker or leave adhesive residue. For the next application, choose a smaller design or a flatter panel and use the backing-peel method described above.
Residue after removal can often be softened with a little warm, soapy water and a soft cloth. Work patiently and avoid scraping with a blade or metal edge, especially on painted or coated bottles. If the bottle’s own care guide recommends a particular residue-removal method, follow that guidance first. Once the surface is clean, rinse and dry it before adding a replacement.
Fading, scuffs, or a damaged print are signs to retire the sticker rather than trying to restore it with polish or a coating. A fresh design can look better and is easier to care for than one with a cracked or contaminated edge. When choosing the replacement, reconsider the original placement: a less exposed side panel, a smaller format, and hand-washing may solve the underlying problem.
With a clean starting surface, measured application, and gentle washing, decorating a bottle can remain simple. Treat each sticker according to its listed features, observe how your own bottle is used, and make small adjustments when an edge or high-contact area shows wear.
Related reading: How to Choose Stickers for Journals and Planners · Vinyl vs. Paper Stickers: A Complete Guide · Best Stickers for Scrapbooking: A Creative Guide