Choosing between sticker sheets vs die-cut stickers is less about which format is “better” and more about how you plan to use the design. A sheet gives you a coordinated group of stickers to arrange over time, while a die-cut sticker is a single, ready-to-place accent. Your project surface, available space, decorating style, and need for portability should guide the decision. This practical comparison breaks down the differences so you can choose confidently from the stickers collection.
What is the practical difference?
A sticker sheet keeps multiple individual stickers together on one backing sheet. You peel out only the piece you want, then store the remaining designs as a set. The format is useful when a project needs several related motifs or when you prefer to plan a page before committing to every element. For example, the Penpal Snail Mail Aesthetic Matte Sticker Sheet is a 4 by 6 inch sheet with 14 individual snail-mail-themed stickers. It can provide envelope details, planner accents, and small decorative marks from one coordinated purchase.
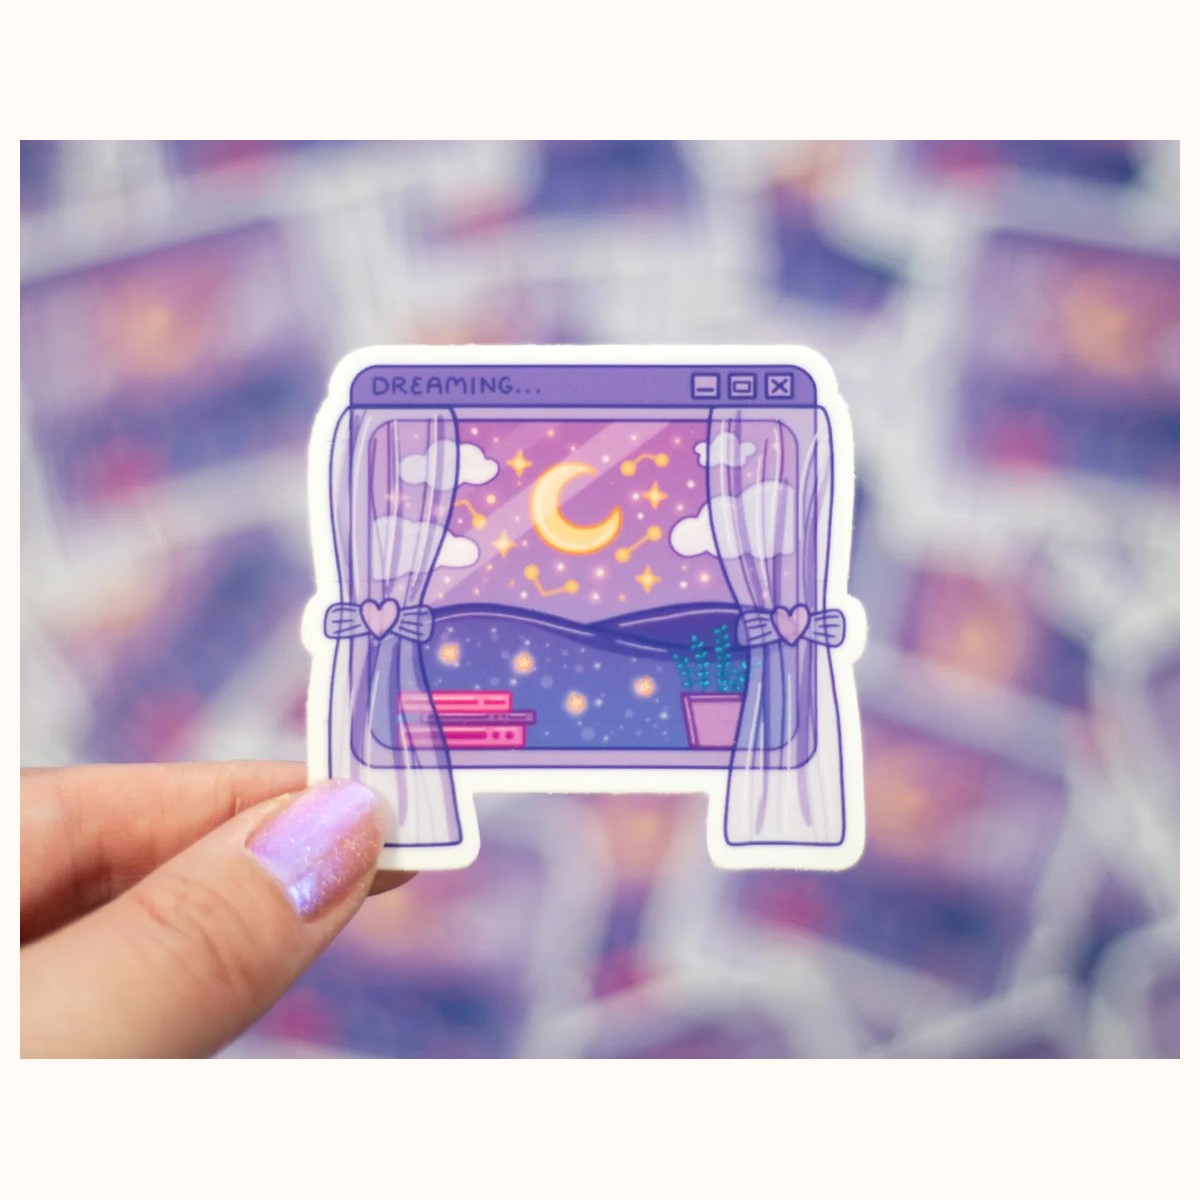
A die-cut sticker is an individual sticker trimmed around its own design. It is ready to place without separating it from a larger sheet, so it works well as a focal point, label accent, or single embellishment. The Dreaming Window Aesthetic Cute Vinyl Sticker, for example, is a compact individual design measuring approximately 2.5 by 2.3 inches. Its standalone shape makes it easy to add to a laptop, notebook, bottle, or a small open area without first sorting through a collection.
The difference is therefore about workflow as much as appearance:
- Choose a sheet when you want variety, coordinated details, or several decorating sessions from one backing.
- Choose a die-cut sticker when you want one prominent design that can be handed over, applied, or moved independently.
- Use both when a large project needs a main focal sticker plus smaller accents around it.
Do not assume that every sticker sheet is only for paper or that every die-cut sticker belongs on a particular object. Check the individual listing for its stated finish and intended examples, then match those details to your surface. If you are unsure about a product’s current description or suitability, verify it through Farouk Book Store’s contact page before applying it to an important item.
Match the format to your project surface
For planners, journals, letters, and scrapbook pages, a sticker sheet usually offers the most flexibility. Small elements can fill gaps, mark categories, or create a visual rhythm without making every page look identical. The Cloudy Skies Aesthetic Sticker Sheet contains 12 individual stickers on a 4 by 6 inch sheet, with a soft, dreamy theme suited to layouts that need several related accents. Try placing larger pieces first, then use the smaller ones near headings, corners, or empty margins.
For a notebook cover, laptop, water bottle, or phone case, start by measuring the usable area rather than judging size from a screen image. A die-cut sticker can be easier to center and evaluate because its final outline is visible before application. The Popsicle Cute Aesthetic Vinyl Stickers are individual popsicle-shaped stickers measuring approximately 1.8 by 3.25 inches. That makes them a straightforward option when you want one playful shape on a small or medium smooth surface.
Surface preparation matters for either format. Wipe dust and residue away, allow the area to dry, and avoid applying over seams, heavy texture, or loose coatings. On a curved object, gently position the center first and smooth outward to reduce wrinkles. If a sticker starts to sit crooked, stop before pressing the entire piece down; lift carefully from an edge and realign if the material and surface allow it. Repeated peeling can reduce confidence in the final placement, so use a piece of removable paper as a temporary size-and-position guide.
A sheet can be the better choice when the surface is broad and you want a collage. A die-cut piece can be the better choice when the available area is narrow, the design needs visual emphasis, or you are decorating an object that already has other details. When the surface will encounter moisture, rely only on the product listing’s stated waterproof or weatherproof description, and remember that the surface itself, edges, and adhesive conditions still affect real-world performance.
Compare portability, storage, and application
Sticker sheets are efficient to store because the designs remain together. Keep the backing flat inside a planner pocket, document sleeve, or rigid folder so corners do not bend. If you cut out one design from a sheet, retain the remaining backing and label the theme if you have several sheets in rotation. This prevents the common problem of finding a small leftover sticker but forgetting which project it was intended for.
Die-cut stickers are convenient for sharing and carrying individually. You can place one in a card, envelope, pencil case, or project kit without taking the rest of a sheet along. They are also easier to sort by theme or color in a small envelope. The trade-off is that loose stickers can collect dust or lose their protective backing if stored carelessly. Keep the adhesive side covered until you are ready to apply it, and avoid stacking exposed adhesive surfaces together.
Application technique also differs slightly. With a sheet, bend the backing gently rather than forcing each sticker off from a corner; this can make the edge easier to lift without sharply creasing the sticker. For a die-cut sticker, hold the backing or a clean edge rather than touching the adhesive repeatedly. On a journal spread, test the arrangement with the stickers still on the sheet whenever possible. On a bottle or device, position the standalone sticker with the longest visual edge aligned to the object before smoothing it down.
If the first attempt goes wrong, diagnose the problem instead of adding pressure. A crooked sticker may need careful edge lifting, while trapped air may respond to smoothing from the center toward the outside. A dusty or damp surface can prevent a neat bond, so clean and dry it before trying another sticker. If the design is too large, do not force it around a tight curve; choose a smaller individual sticker or use sheet pieces on a flatter area instead.
Make the final choice—and build a better project
Choose a sticker sheet when your priority is creative range. It is especially useful for weekly planner decorating, penpal mail, scrapbooking, study notes, and gift wrapping where multiple small decisions happen over time. Before buying, ask: Do I have several surfaces or pages to decorate? Will I use at least a few different motifs? Do I want a consistent theme? If the answer is yes, the sheet format reduces the need to coordinate unrelated designs.
Choose a die-cut sticker when your priority is clarity and commitment. It suits a single laptop accent, a bottle detail, a notebook cover, a small gift enclosure, or a focal point in a larger collage. Ask: Is there one design I already know I want? Do I need to carry or share just one? Is the available area close to the listed dimensions? If yes, a standalone sticker is likely the simpler choice.
A useful hybrid approach is to establish a visual hierarchy. Put one die-cut sticker where the eye should land, then use two or three sheet stickers as supporting details. Leave breathing room around the focal point instead of filling every gap. For a letter, a sheet can supply a small envelope seal accent and corner details; for a laptop, one larger individual design can anchor a few smaller pieces near the edge. Test the arrangement temporarily before pressing anything down.
Finally, read the listing rather than relying on the category name alone. Confirm the dimensions, number of stickers, finish, and any stated waterproof or weatherproof description. Product colors can appear different in person because of photography, lighting, printing, and screen settings, so allow for a small visual difference when planning a tightly matched palette. With those checks complete, the decision is simple: pick the sheet for coordinated possibilities, the die-cut sticker for an independent statement, or combine both for a layered project that is easier to plan and personalize.
Related reading: How to Choose Stickers for Journals and Planners · Vinyl vs. Paper Stickers: A Complete Guide · Best Stickers for Scrapbooking: A Creative Guide