The best pin display ideas balance personality with everyday use. A jacket or bag needs a layout that will not catch on sleeves and straps, while a desk board can give your collection room to grow. Start by deciding whether you want a wearable arrangement, a removable display, or a little of both. Then group pins by color, subject, size, or the stories attached to them. This guide covers practical placement, spacing, security, and easy changes for real-life collections.
Start with the surface and the job it needs to do
Before arranging anything, identify how the display will be handled. A jacket worn outdoors faces movement, friction, and occasional snagging. A backpack is lifted by its straps and placed on floors or chairs. A desk board usually stays in one place, so it can prioritize composition over portability. The same pin can work in all three settings, but the best position may differ.
For clothing, lay the garment flat and mark its natural visual zones. A denim jacket often has a chest area, a collar or lapel, and a lower pocket region. Keep the first few pins where you can see them without covering seams, buttons, or the pocket opening. On a bag, choose a panel rather than a high-contact edge. Avoid the underside of a strap, the base that rests against a chair, and any fold that is repeatedly bent.
A desk board offers more freedom. Cork, fabric-covered boards, and other pin-friendly surfaces can hold a themed arrangement near a reading corner, study area, or worktable. Leave a margin around the outside so the display does not look cramped and so your fingers can reach the backs when you rearrange it. If the board is not designed for pins, do not force a sharp post into a hard or brittle surface; use a suitable alternative display method or confirm the surface with the maker.
Make a paper template before committing to holes. Trace the usable area of the jacket panel, bag pocket, or board onto paper, then place small paper circles or squares where each pin may go. This reveals crowded corners and awkward overlaps without stressing the fabric. It also helps you decide whether the display should be symmetrical, clustered, or intentionally irregular.
Arrange pins by a clear visual rule
A collection looks more deliberate when it has one organizing idea. A color story is useful when the pins have different subjects but share tones. Place the strongest color near the center, then use quieter colors around it. If the pins are mostly gold-edged, silver-edged, or mixed-metal designs, repeat the dominant finish in two or three areas rather than isolating it in one corner.
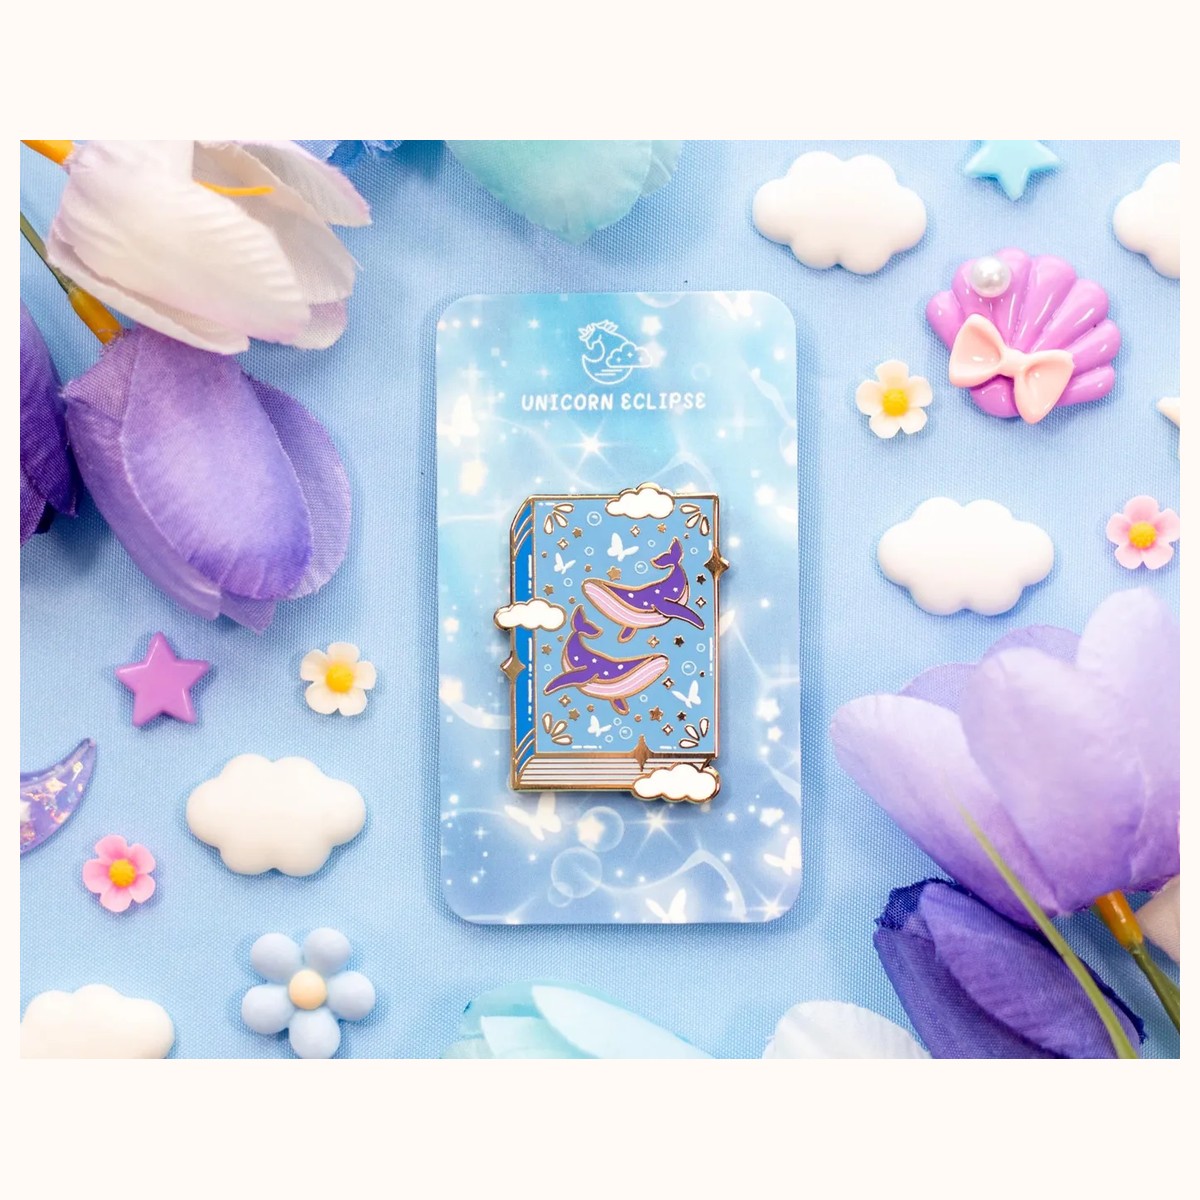
A subject-based cluster works well for a desk board or the front of a jacket. For example, the Whale Book Enamel Pin can anchor a reading-themed group. Its approximate 1.25 x 1.75-inch shape gives it enough presence to act as a focal point without taking over a panel. Pair it with other bookish or ocean-inspired pieces if you have them, or let it stand alone with a little breathing room. You can find it on the Whale Book Enamel Pin product page.
For a balanced cluster, use one larger or more distinctive piece, two medium pieces, and several smaller accents. The exact number depends on the surface, so treat this as a starting pattern rather than a rule. On a narrow bag pocket, one focal pin and one companion may look finished. On a broad desk board, repeat the pattern in separate groups while keeping clear paths between them.
A grid is effective when your pins are similar in size. Use removable painter’s tape to create light horizontal and vertical guides, then space the pins evenly. Remove the tape after checking the composition. A loose grid is often better for mixed shapes: align the centers of some pins while allowing tall, wide, or irregular designs to break the edge slightly.
If you prefer a collected look, use an anchor-and-echo layout. Put the most meaningful pin slightly off-center, then echo one feature—such as a color, outline, or theme—nearby. The Sakura Enamel Pin, for instance, can provide a floral focal point on a jacket or board; its approximate 1.5 x 1.5-inch footprint is easy to pair with a narrow vertical pin or a small round button. See the Sakura Enamel Pin product page for its listed size and design details.
Practical jacket and bag layouts
For a jacket, begin with the area you will actually see in a mirror. A three-pin diagonal across the chest can feel intentional without filling the whole garment. Place the largest pin nearest the center, then move smaller pieces outward. Check the collar fold and zipper path before pressing posts through fabric. If a pin sits beside a seam, leave enough space for the seam to flex rather than forcing the backing against a ridge.
Another option is a lapel pair: place two related pins at different heights, leaving the lapel edge clear. This works especially well with compact designs such as the approximately 2 x 1-inch Ticket Enamel Pin. Its horizontal shape can point toward the jacket opening, but rotate it before fastening so the orientation feels natural when the garment is worn. For a more graphic arrangement, the approximately 2 x 1-inch Frozen Sword Enamel Pin can serve as a vertical counterpoint. Both are listed in the Pins & Pinback Buttons collection.
Bags need a more defensive layout. Put pins on the front-facing panel where they can be seen, but keep them away from handles, zipper teeth, and the lower corners that brush against surfaces. On a backpack, test the bag while it is empty and while it carries its usual load. A panel can change shape when the bag is full, so a pin that looks flat on an empty bag may tilt or pull the fabric when packed.
Use the two-clutch backing as a placement clue when the product has two posts. Press both posts through the same layer of fabric when possible, and check from inside the bag that the clutch is fully seated. If the fabric is unusually thin, heavily stretched, or lined with a material you do not want to puncture, use a removable board display instead. Do not assume a backing is childproof or impossible to lose; inspect it periodically, especially after the bag has been carried in crowded spaces.
A useful decision is whether the display is permanent or rotating. Keep favorite pins on a jacket and move seasonal or newly collected pieces to a desk board. Photograph the layout before removing anything. The photo becomes a quick reference when you want to recreate the arrangement, and it prevents the familiar problem of remembering the pieces but not their spacing.
Build a desk board that is easy to change
A desk board is most useful when it supports both display and decisions. Divide the surface into zones such as “wear next,” “favorites,” and “new arrivals,” or keep one open area for experiments. Small paper labels tucked beside a group can explain a theme without covering the pins. If you use notes, keep adhesive products on a removable part of the board and avoid placing them over enamel or metal surfaces.
Plan for hand access. Leave enough gap between pin groups to grasp a clutch, and do not bury a small pin behind a large one. For a board near a desk lamp, check the display from both sitting and standing height; glare or a low viewing angle can make a polished surface harder to read. A matte background can provide visual separation, while a busy patterned background may compete with detailed designs.
Try a three-zone composition: a focal group at one side, a smaller supporting group opposite it, and an open area in between. The empty area is not wasted space—it gives you somewhere to test a new pin without dismantling the collection. If the board feels lopsided, first move the largest piece rather than adding more. Often the issue is visual weight, not a shortage of pins.
For a portable alternative, use a small pin-friendly panel or fabric swatch stored in a drawer. This creates a display you can rearrange away from the jacket or bag, then transfer only when the layout is settled. Keep spare backings in a labeled envelope or small container. A missing clutch can make a favorite pin unusable at the moment you want to wear it.
Troubleshoot loose pins, crowded layouts, and wear
If a pin rotates, first check whether both posts have passed fully through the fabric and whether each clutch is pushed up evenly. Re-seat the pin on a flat surface instead of tightening it while the garment is hanging. If it still shifts, move it away from a seam or a stretched section. For a bag, inspect the inside lining and pocket contents to make sure nothing is pressing against the posts.
If a display looks crowded, remove the smallest pieces first and reassess the negative space. Crowding often comes from placing every pin at the same visual height. A staggered arrangement can solve the problem, but only if the posts and backings remain accessible. On a desk board, group similar pins rather than spreading them thinly across the entire surface.
If a pin catches on clothing, straps, or hair, relocate it before the snag becomes a repeated annoyance. Smooth, compact layouts are usually better for high-contact areas than arrangements with many projecting edges. When a jacket goes into a closet or a bag is stored, avoid stacking heavy items directly on the pins.
For cleaning, follow the product’s care guidance and use a soft, dry cloth for light dust when appropriate. Avoid soaking a pin or applying household chemicals simply because the metal looks dull. If color, finish, or backing changes, pause and check the product information or contact Farouk Book Store for verification. Product colors can look different under lighting and on screens, so judge the arrangement in the setting where it will be displayed.
A good pin display remains easy to wear, inspect, and change. Choose the surface first, establish one visual rule, protect high-contact areas, and leave enough space for the collection to evolve. Whether your final arrangement is a two-pin bag accent or a full desk-board constellation, the most successful layout is the one you can enjoy without constant repairs.
Related reading: How to Build a Personalized Gift Bundle · 10 Best Creative Keychains for Thoughtful Gifts · 2026 Stationery Trends: Color, Texture, and Joy